
The lighting in our caravan is a bit “all or nothing”. We have the LED spot lights (good for reading), the decorative wall light and LED strip around the sink and then the overhead interior lights which provide plenty of light, but are just too much in the evening when you want to watch TV.
Since replacing the fluorescent under cupboard lighting in our kitchen at home with LED strip lights, I have been thinking of trying out a set in our caravan. The cost of these LED kits is incredibly low (less than £15 including postage) and they come with everything you need; the LED strip, 12 volt (DC) powered control box and a remote control unit.

There are a variety of different LED strip lighting kits around and the ones I would recommend are those that say “RGB White” – which indicates they have a “White light” mode. RGB, stands for Red, Green and Blue and refer to the three colour LEDs that these strips use. Some only allow these three colours to be selected, but the ones that say “White” also have a white light mode, which is probably the mode you will end up selecting most of the time, after the colour changing novelty wears off !
The exact kit that we ended up using was this one from re-seller “MK-Deal” on eBay and we went for the 4m length with no AC power supply, as the LEDs will wire directly in to the van’s 12v DC system….
The kit turned up in a few days and worked perfectly. The IP65 rating refers to water proofing and although not strictly necessary, we went for this type because the clear rubber coating the manufacturer applies looks good and provides extra physical protection to the LEDs….
A quick test before going to the caravan, if you have a 12v DC source at home, is recommended – nothing worse than installing something only to find it does not work. It took me about 2-3hrs to get everything installed, but I did not have the benefit of this useful guide (!) and I was also taking photos and video while I worked. I would recommend this to anyone with reasonable DIY skills and electrical wiring experience.
The tools you will need are;
- Selection of screw drivers
- Wire cutters and strippers
- Scissors
- Tweezers (useful in removing adhesive tape backing)
- Drill with 4mm and 12mm bits
- Multi-Meter
- Pencil
You will need some electrical crimps or other means of joining wires together but the exact method of joining will vary depending upon where you take the 12v feed from and the type of wiring you find. The only additional item I would recommend is an extra reel of double sided adhesive tape. The LED Strip Light Kits are very good, BUT I have found that the adhesive tape used is inconsistent and often lacks “stickiness”. For the sake of some extra tape, you will get a much better end result and no chance of the LED strips coming unstuck.
Step 1 – “Offer Up” the LED Strip Lights
Every caravan is different but most have a curtain rail and this is a good place to mount the LED strip. I went for a 4m strip and you can trim them down if they are too long, but they have to be kept in one length and so working out how far you can run the strip and where the best place to take a 12v supply for it from is an important first step. Do not rush this stage and plan it carefully. Below is a photo which shows the layout at the front of our van.

I wanted to run my 4m strip of LEDs from the left hand window all the way across the front window and then up an equal distance to the right hand window, taking the power from the LED spot light between the right hand window and the sink work surface. In order to do this, I would need to drill two holes in the pelmet, the wooden panel that goes all the way across the front on the van, hiding the curtain rail. The holes would allow the LED strip to pass through the pelmet and up each side of the caravan.
Step 2 – Drilling the Pelmet
I wanted the holes to be as close to the side pelmets as possible to reduce the radius of the bend I would need the LED strip to have. Also the holes needed to be big enough for the strip to pass through about 10-12mm. Before taking the pelmet down I marked each end with a pencil to show where the side pelmets were.

The pelmet is secured by a series of screws, which need to be removed and put somewhere safe. Carefully lower the pelmet being careful not to scratch the sides of the caravan as the pelmet’s length makes it slightly unwieldy.


Next I marked the middle of the pelmet and also the middle of the LED strip, with a pencil on the adhesive side. Later we will line the marks up so we know the LED strip will be equal length on the left and right sides of the caravan.

Now drill a pilot hole (4mm) at each end outside of the pencil marks you made. Allow for the fact that the final holes will be 12mm diameter and you also want the LED strip to run along the middle of the pelmet so that it is not directly visible when you are seated.

Swap the pilot drill for the 12mm drill and enlarge the pilot holes.

Step 3 – Sticking the LED Strip to the Pelmet
Lay the pelmet down making sure that it is the right way round in relation to how it fits in to the caravan. The LED strip lighting has a large 4 pin plug at one end and this will not go through our 12mm holes, so it will be necessary to feed the other end of the LED strip through both the holes in the pelmet.

It is very important that you start feeding the LED strip through the hole on the side where the electric supply will be taken from, then line up the center mark of the pelmet with the centre mark of the LED strip and finally pass the excess LED strip through the other hole in the pelmet.

The next step is to stick the LED strip to the pelmet. Using the extra reel of double sided adhesive tape stick a piece to the full length of the pelmet in line with the two holes you drilled.

Now remove the protective film from the adhesive tape on the pelmet and also on the back of the LED strip. Stick the LED strip to the pelmet making sure the center marks still line up.

Step 4 – Refit Pelmet and Finish Sticking the LED Strip
Now refit the pelmet making sure all screws are not over tightened as it is very easy to break the thread when re-screwing self tapping screws in to chipboard. Care must also be taken with the over hanging LED Strips on either end of the pelmet an also not to scratch the caravan walls – just be careful OK !!

The photo above shows how the LED strip comes through the hole in the pelmet and this must now be stuck to the Left and Right hand side pelmets. It is quite fiddly to apply the double sided adhesive tape with the pelmets in-situ but take your time and it will be fine. Make sure you apply enough tape to go the full length of the LED strip and then remove the adhesive film and press the LED strip in to place.
Do not put the LED strip under too much pressure where it comes through the pelmet holes as this is where the adhesive tape will struggle and you may wish to use some hot glue to provide extra adhesion to the LED tape.
Step 5 – Connecting up the 12v Electric Supply
Hopefully in your planning stage you identified a good location to take a 12v feed from and your 4 way LED strip connector is close to where the feed will be taken. On my van I wanted to access the feed to this spot light which is directly below the Stereo Radio, which made hiding any connections very easy.

Never having opened up the panel box that houses the Stereo Radio, I was not sure what to expect. What I found, was a lot of toast crumbs (our toaster travels in this cupboard!) and some pretty strange wiring, which I put down to our van being a dealer special with some new features new to the production line at Swift.
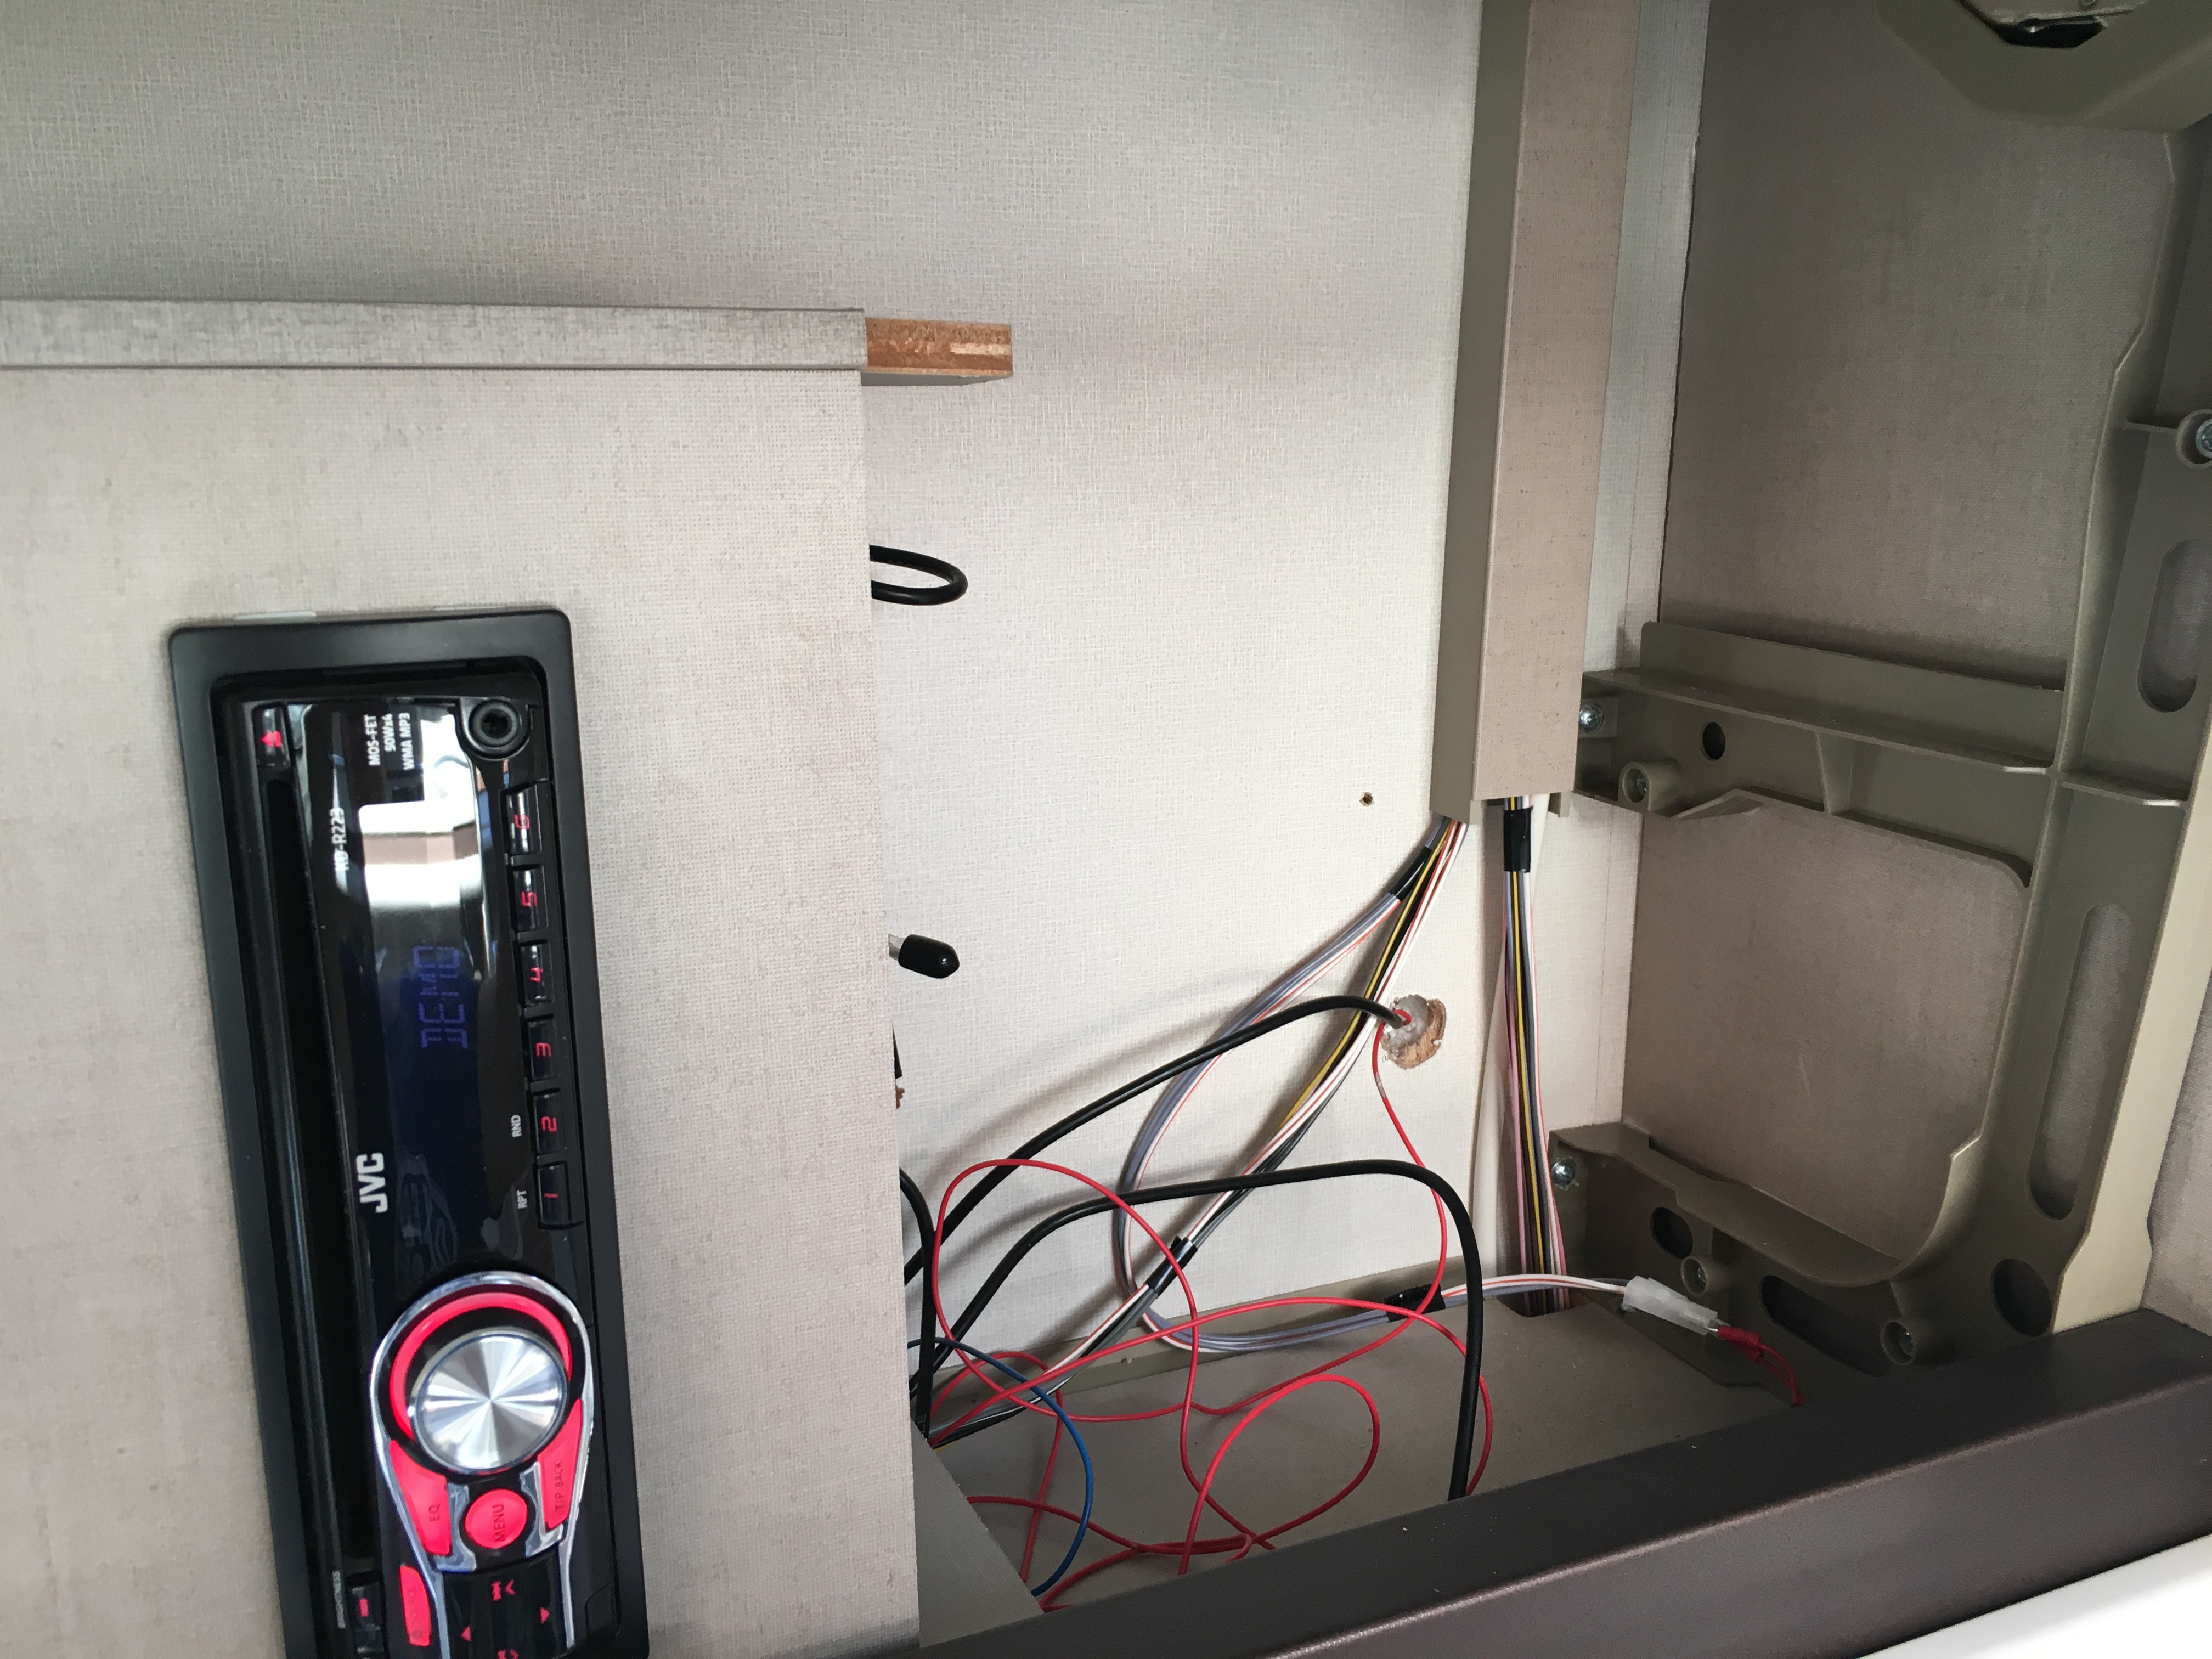
Having confirmed that I would be able to tap in to the Spot Light circuit, I assumed that the grey wires, of which there were quite a few were the ground (-) wires and the coloured wires were the switched circuit (+) wires. The spot light gave me no clues, as it had two red wires (!), and having spent years coming across the unexpected, I measured the voltage to the spot light. Thank goodness I did, as it turns out the grey wires are the 12v positive feed, as you can see from the -13.63v voltage (negative) measured by my multi-meter.

Well having avoided that bomb shell and seeing that there was room to drill up through the panel, that was exactly what I did next.

Next job was to remove the red crimp spade connectors from the spot light and remaking some new spade connectors with the spot light and the power lead for my LED strip lights in parallel.

With the electrical connections made but not plugged back in yet, I could secure the little LED controller behind the pelmet with some more of the double sided adhesive tape and also stick the remote control sensor so it was just visible below the pelmet.
IMPORTANT – when connecting the 4 way connector of the LED strip light to the controller, make sure you line up the arrow head on the controller socket to the “1” mark (I think that is what it is suppose to be) on the black 4 way plug of the strip light. You can make out the arrow on my photo below (if you zoom in) but unfortunately the “1” mark on the black connector is not visible. In real life there is a visible mark and just make sure they line up and you will be fine.

So now for the moment of truth, I plugged the two newly made crimp connectors back in to the spot light feed and pressed the ON switch of the remote control. Let there be light and there was…

With a triumphant smile on my face, I quickly put everything back together again and called Kay to come and see my handy work, I even made a little video of the different light colours and effects…..
